The month of October is one of transformation. The temperature cools off, the leaves begin to change color, and comfortable clothing becomes more popular. It’s the ideal opportunity to use nail art to showcase your creativity and love of yourself. This month, we’re emphasizing styles that are not only current but also simple to use and ideal for college-age women. Let’s get started with the top 3 nail art trends for October.


1. Fall French Twist:
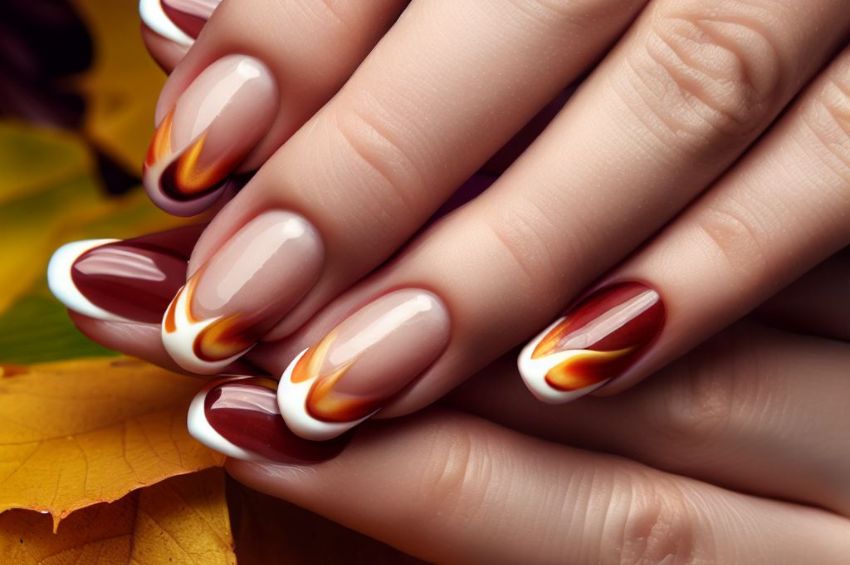
A great method to show off your individuality and creativity is through nail art. The Fall French Twist is a stylish and current style that combines a traditional French manicure with the rich, warm colors of autumn. Here is a step-by-step tutorial for making this lovely nail art design.
Gather Your Supplies:
Make sure you have all the necessary materials on hand before you begin. You’ll need a base coat, a top coat, dark purple, gold, and light pink nail polishes as well as a fine brush for detailing.
Prep Your Nails:
Your nails should be cleaned and shaped first. Push back your cuticles and take off any previous nail paint. After that, shape your nails as you like.
Apply the Base Coat:
Each nail should have a thin coat of base coat applied. Your nails will be more protected, and your nail paint will last longer.
Paint the Base Color:
Put on two layers of pale pink nail paint after the base coat has dried. This will act as the design’s primary color.
Add the Gold Strip:
Next, dab the gold nail paint on your thin brush. Each nail’s tip should have a tiny strip of paint carefully applied. This will give the conventional French manicure a contemporary spin.
Paint the Purple Edge:
Once the gold strip has dried, paint a tiny line at the very edge of each nail with your thin brush and dark purple nail color. This will give your design a splash of color and a hint of autumn.
Apply the Top Coat:
Apply a top coat to each nail once all the nail paint has dried. Your design will be sealed in and given a glossy look by doing this.
Clean Up and Enjoy:
Finally, use a cotton swab dipped in nail paint remover to clean off any nail polish that may have gotten on your skin. You can now display your stunning Fall French Twist nail art!
Remember, practice makes perfect. Don’t be discouraged if your design doesn’t turn out perfect the first time. With a little patience and creativity, you’ll be a nail art pro in no time. Happy painting!
2. Fall Botanical Nails:
A lovely way to commemorate the passing of the seasons is with the Fall Botanical Nails design. With its brilliant colors and leaf patterns, this design perfectly portrays the spirit of autumn. Here is a step-by-step tutorial for making this gorgeous nail art design.
Gather Your Supplies:
A base coat, nail paint in various fall hues (such as red, orange, and yellow), a top coat, and a fine brush for detailing are required for this design.
Prep Your Nails:
To begin, clean your nails and take off any previous nail polish. Next, give your nails the shape you choose and pull back your cuticles.
Apply the Base Coat:
Give each nail a base coat. Your nails will be shielded and your nail paint will adhere more effectively.
Paint the Base Color:
Select a base color that goes well with the autumnal hues you’ll use for your leaf patterns. Each nail should receive two applications of this color.
Paint the Leaf Designs:
One of your nail paints in fall hues should be dipped into your tiny brush. After that, meticulously paint leaf patterns onto each nail. For a more realistic appearance, you can build leaves in a variety of sizes and shapes.
Add More Colors:
Use your additional fall-themed nail paints to complete step 5 again. Your leaf designs will have additional depth and character if you layer several hues.
Apply the Top Coat:
After your leaf patterns have dried, give each nail a top coat. Your design will be sealed in and given a glossy look by doing this.
Admire Your Work:
Enjoy looking at your stunning Fall Botanical Nails design now! Every time you look at your nails with this pattern, you’ll feel as though you’re wandering through a fall forest.
Keep in mind that creativity and patience are the keys to outstanding nail art. Don’t be scared to try out different hues and patterns. Have fun drawing!
3. Olive Green Leaf Nails:
It’s easy to embrace fall with the Olive Green Leaf Nails design. This pattern creates an appearance that is both beautiful and festive by fusing the earthy tones of olive green with the metallic sheen of silver. Here is a step-by-step tutorial for making this gorgeous nail art design.
Gather Your Supplies:
A base coat, an olive green nail polish, a silver nail polish, a top coat, and a small brush for detailing are required for this design.
Prep Your Nails:
To begin, clean your nails and take off any previous nail polish. Next, give your nails the shape you choose and pull back your cuticles.
Apply the Base Coat:
Give each nail a base coat. Your nails will be shielded and your nail paint will adhere more effectively.
Paint the Base Color:
Apply two layers of olive green nail paint to each nail after the base coat has dried. This will act as the design’s primary color.
Paint the Leaf Designs:
Take a little brush and dip it into the silver nail paint. After that, meticulously paint leaf patterns onto each nail. For a more realistic appearance, you can build leaves in a variety of sizes and shapes.
Apply the Top Coat:
After your leaf patterns have dried, give each nail a top coat. Your design will be sealed in and given a glossy look by doing this.
Admire Your Work:
It’s time to ogle your gorgeous Olive Green Leaf Nails design at this point! Every time you look at your nails with this pattern, you’ll feel as though you’re wandering through a fall forest.
Keep in mind that creativity and patience are the keys to outstanding nail art. Don’t be scared to try out different hues and patterns. Have fun drawing!
Conclusion:
A creative and enjoyable way to appreciate the seasons and show your love for yourself is via nail art. There is a design out there for everyone, whether you like the traditional French manicure or would rather have something more vibrant and daring. Why not give one of these patterns a try this October? Keep in mind that having fun and letting your personality show through your nails is what matters most. Have fun drawing!
Give yourself some love this month. Today, try a new nail art style!

